Create an XML Feed with Google Sheets
I recently had the challenge of facilitating regularly scraped data into an XML feed. In the past, I've devised all sorts of ways to scrape, and prepare data, for example, for retailer and affiliate feeds.
So, if you need to be able to convert frequently updated data in CSV or spreadsheet form into an external XML feed, I've produced a step by step guide on how to make that happen with free tools.All you'll need is some data, Google Sheets and the Apps Script I've created below.
Step 1: Prepare Your Google Sheet
First, create or open a Google Sheet containing the data you want to convert to XML.
The first row should always contain your column headers - these will become your XML tags, so be careful to mimic the naming convention for your target app XML schema requirements.
Step 2: Create the Apps Script
- Open your Google Sheet
- Click on "Extensions" in the top menu
- Select "Apps Script"
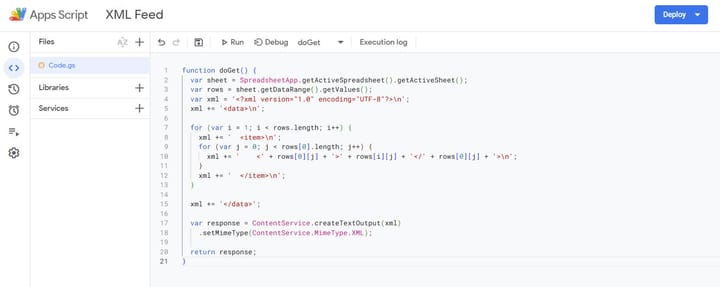
- In the Apps Script editor, paste the following code:
function doGet() {
var sheet = SpreadsheetApp.getActiveSpreadsheet().getActiveSheet();
var rows = sheet.getDataRange().getValues();
var xml = '<?xml version="1.0" encoding="UTF-8"?>\n';
xml += '<data>\n';
for (var i = 1; i < rows.length; i++) {
xml += ' <item>\n';
for (var j = 0; j < rows[0].length; j++) {
xml += ' <' + rows[0][j] + '>' + rows[i][j] + '</' + rows[0][j] + '>\n';
}
xml += ' </item>\n';
}
xml += '</data>';
var response = ContentService.createTextOutput(xml)
.setMimeType(ContentService.MimeType.XML);
return response;
}
This handy little script gets the job done - here's how it works:
- Reads all the data from your active sheet
- Creates an XML structure where each row becomes an
<item>
element - Uses your column headers as XML tags
- Wraps everything in a
<data>
root element - Sets the Mime type to XML
Step 3: Deploy the Web App
- Click the "Deploy" button in the top right corner
- Select "New deployment"
- Click "Select type" and choose "Web app"
- Configure the deployment settings:
- Description: Enter a description for your deployment (optional)
- Execute as: Choose "Me"
- Who has access: Select "Anyone" to make it publicly accessible
- Click "Deploy"
- When prompted, review and authorize the permissions
- Copy the Web App URL provided after deployment
There are a series of authorisation hoops to jump through. They will all feel very familiar as you're essentially granting app permissions on your Google user account. You'll likely get this unauthorized app warning, which is nothing to be concerned about:
Here's the step you just need to pay attention to:
When you click advanced, you can proceed to grant permission. You'll end up with the XML feed URL, which will be accessible externally, anywhere:
Step 4: Using Your XML Feed
The Web App URL you received is now your XML feed endpoint. You can:
- Access it directly in a web browser
- Use it in feed readers
- Consume it in other applications
Here's the powermove: Your XML feed will automatically update whenever your Google Sheet data changes.
This means that (for example) you could hire an Upworker to regularly update your data. In affiliate marketing this is Gold, as you can explore custom pricing feeds from retailers at a tiny fraction of the cost of SAAS scraping services. And that's just one example - there are many more ways to use this so, enjoy!